

Create new banner
To create a new Banner Template, select the merchant you want to work with from the Dashboard and navigate to Banner Templates from the side menu. A pop-up window will appear, allowing you to define the canvas dimensions and settings for your template.
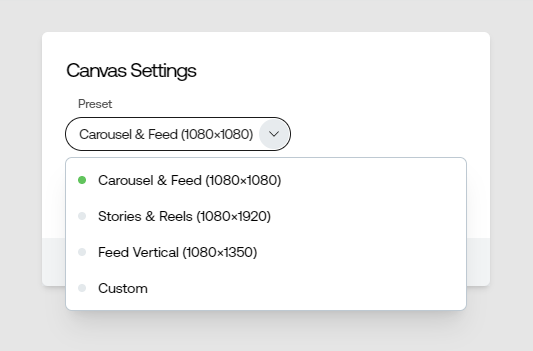
After configuring the desired canvas settings, the Banner Template editor will open, displaying the canvas and its available tools.
In the centre of the screen, you can see the canvas area, where you can drag and drop the elements of each layer to create your design.
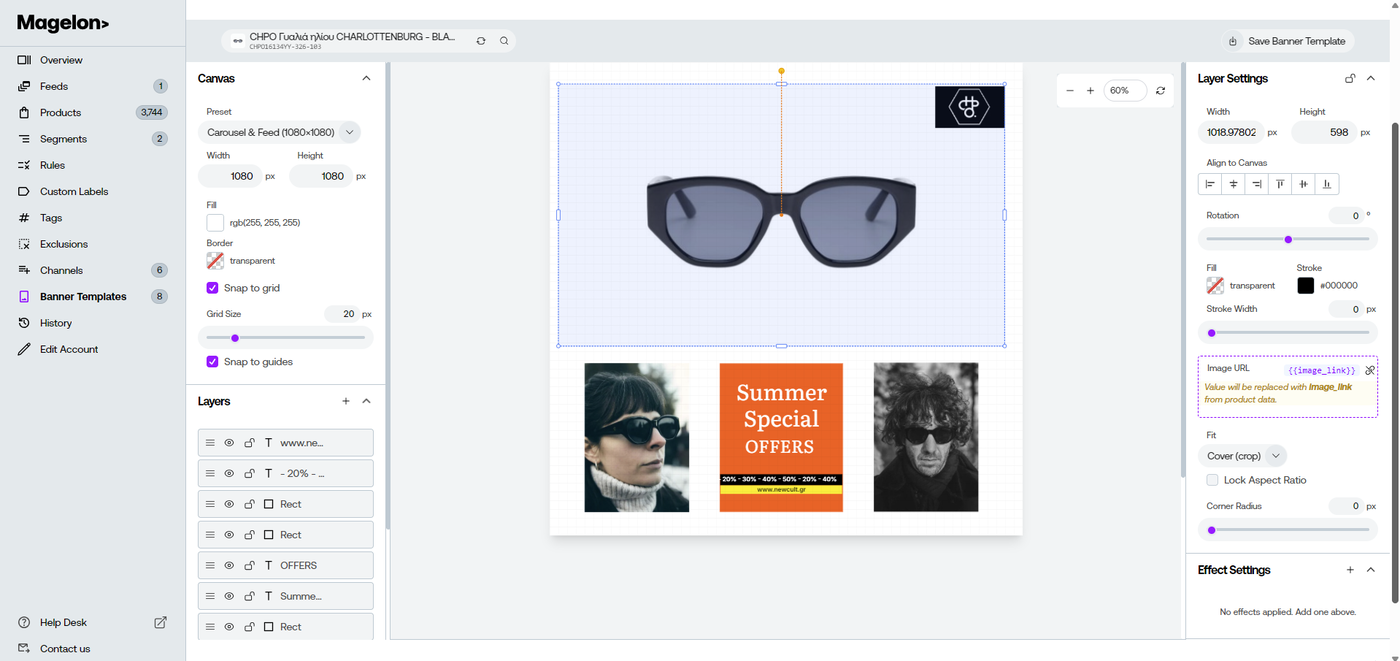
On the left side of the screen, you can manage the canvas settings, including dimensions, background colour, borders, and grid options. You can also enable the Snap to Grid option to help you align elements more accurately. Additionally, you can create and manage the layers that make up your creative, such as text, images, shapes, and icons.
On the right side of the screen, you can access the settings of each individual layer. By selecting a layer, you can adjust its properties, including alignment, rotation, colour fill, fonts, dynamic parameters for images and text, and visual effects such as blur, drop shadow, opacity, and other available options.
Dynamic parameters allow you to automatically populate your banners with information from your product feed, creating personalised creatives based on your catalog data.
How to add a text on your creative
To add a text element to your creative, click on the (+) plus button in the Layers section and select Text from the pop-up list. A new text object will be added to your canvas.
You can drag and drop the text object to position it anywhere on your canvas and adjust its dimensions according to your needs.
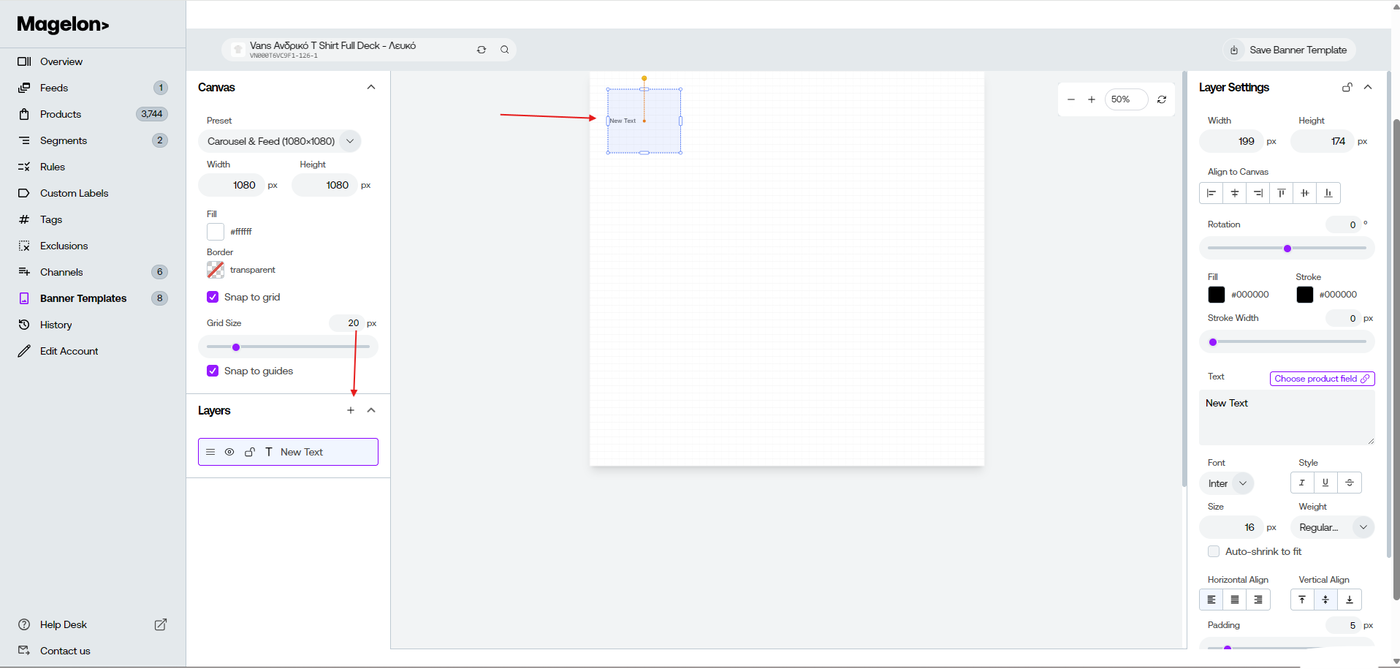
On the right side of the screen, you can access the text settings. From there, you can modify various properties of the text object, including dimensions, alignment to the canvas, rotation, and other available options.
The main setting you need to configure is the text content. You can either add a static text value manually or make the text dynamic by selecting a product field from your feed. Dynamic text allows you to automatically display product-specific information, such as product names, prices, or other attributes.
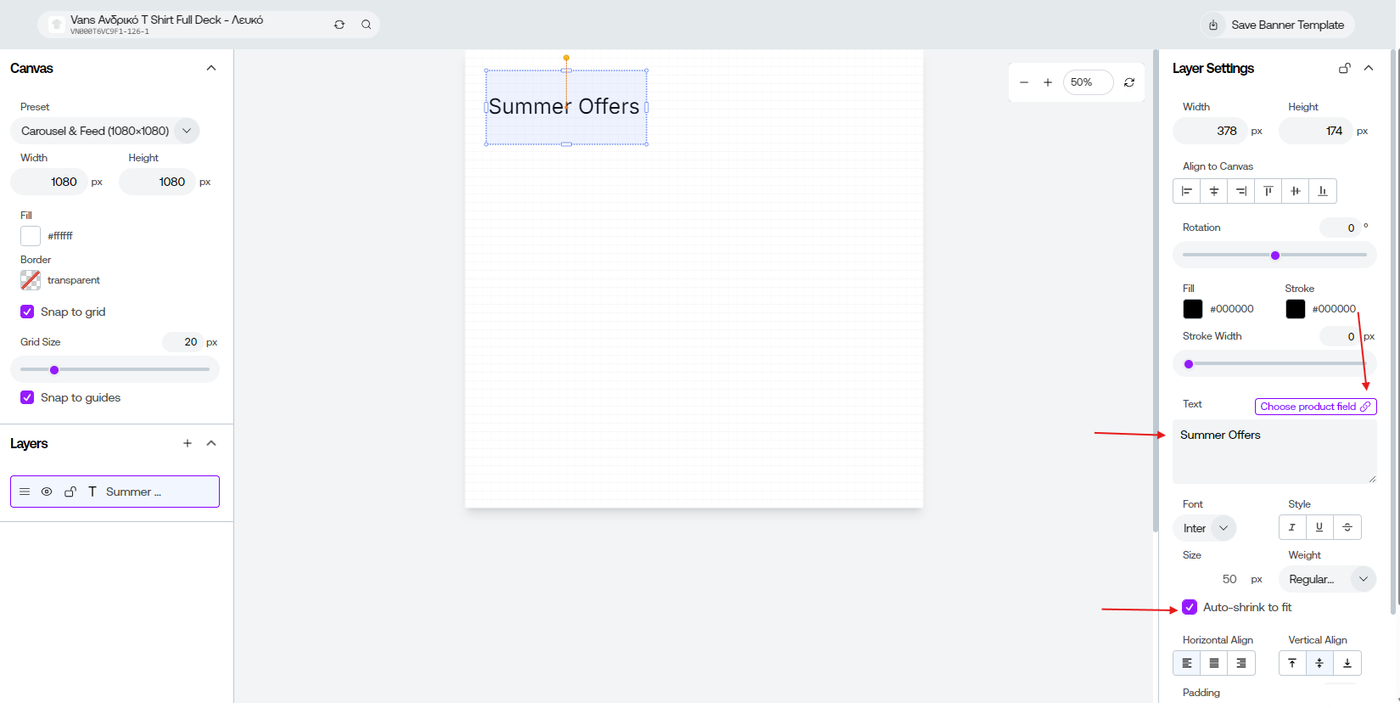
Another useful parameter is the Auto-shrink to fit option. When enabled, any text that exceeds the dimensions of the text object will automatically resize to fit within the available space instead of being cut off.
How to add an image on your creative
To add an image element to your creative, click on the (+) plus button in the Layers section and select Image from the pop-up list. A new image object will be added to your canvas.
You can drag and drop the image object to position it anywhere on your canvas and adjust its dimensions according to your needs.
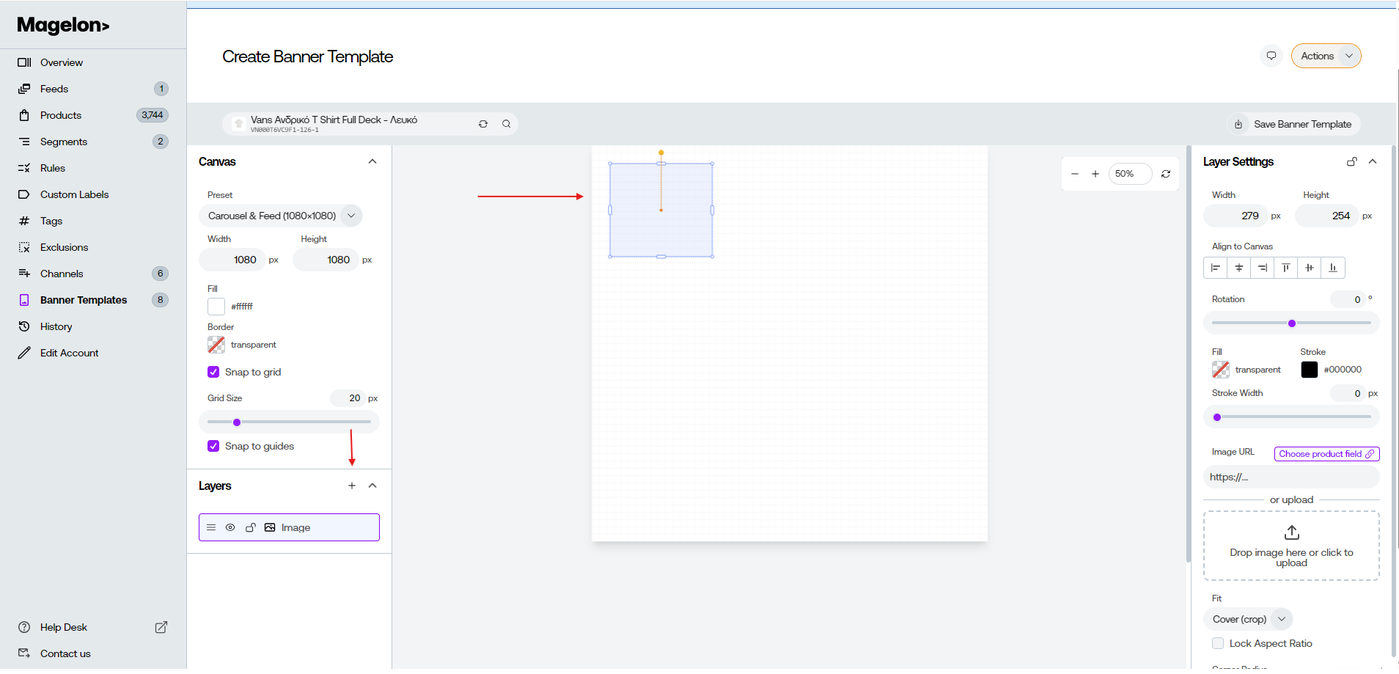
On the right side of the screen, you can access the image settings. From there, you can modify various properties of the image object, including dimensions, alignment to the canvas, rotation, and other available options.
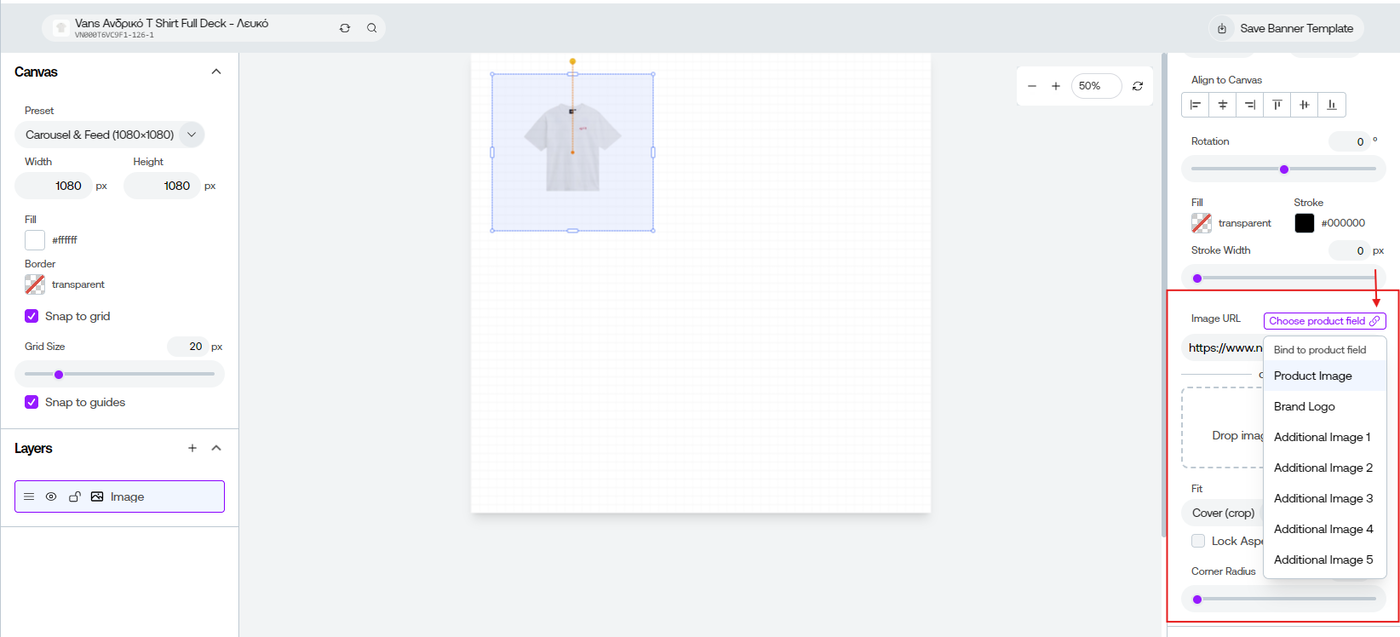
The main setting you need to configure is the image content. You can either upload a static image manually, such as your brand logo or any other visual element you want to include in your creative, or make the image dynamic by selecting a product field from your feed. Dynamic images allow you to automatically display product images from your feed, including the main product image or additional images, depending on the selected feed attribute. This enables you to create personalised creatives that automatically adapt to your product catalog.
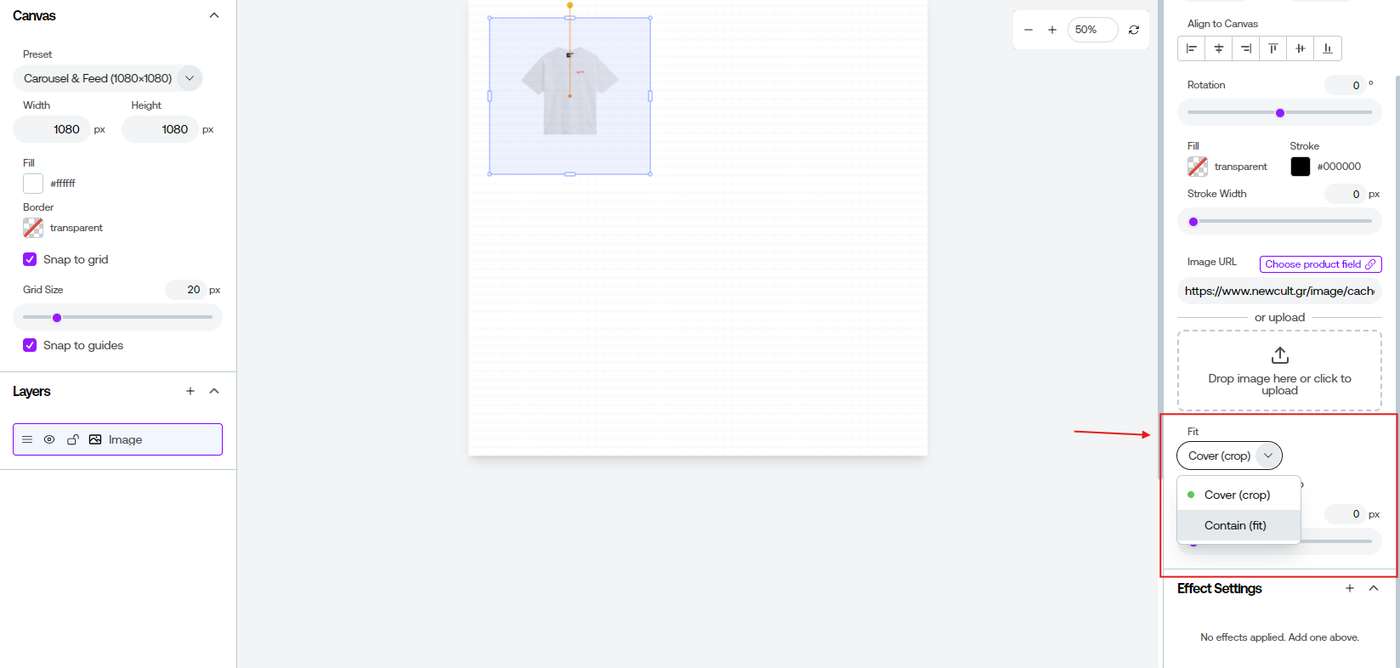
Another useful parameter is the Fit option. You can choose between Cover (Crop) and Contain (Fit), depending on how you want the image to be displayed within the image object.
The Cover (Crop) option adjusts the image to completely fill the object dimensions. If the image aspect ratio is different from the object dimensions, parts of the image may be cropped out to ensure that the entire area is covered. For example, a rectangular image placed inside a square image object may have some parts of the image cut off.
The Contain (Fit) option resizes the image proportionally to fit completely inside the object dimensions. This ensures that the entire image remains visible, but empty space may appear around the image if the aspect ratio does not match the object dimensions.
How to add a shape on your creative
To add an shape element to your creative, click on the (+) plus button in the Layers section and select Shape from the pop-up list. A new shape object will be added to your canvas.
You can drag and drop the shape object to position it anywhere on your canvas and adjust its dimensions according to your needs.
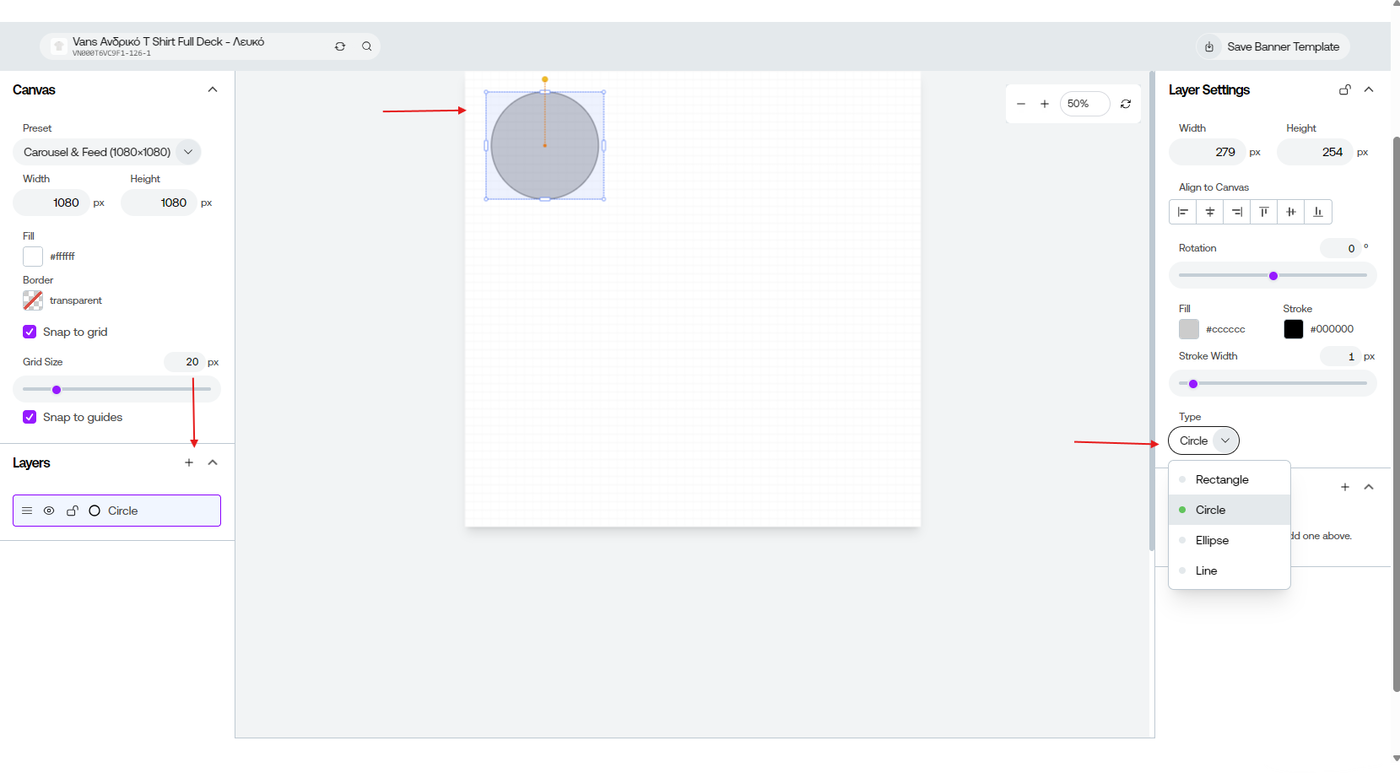
On the right side of the screen, you can access the shape settings. From there, you can modify various properties of the selected shape, including its dimensions, alignment to the canvas, rotation, shape type, and other available options.
By default, a Rectangle shape is created when you add a new shape layer. However, you can easily change it to a Circle, Ellipse, or Line from the shape settings, depending on the design of your creative.
How to add an icon on your creative
You can also add an Icon layer using the same process. Click the (+) button in the Layers section and select Icon from the pop-up menu. Once the icon has been added to the canvas, you can choose the desired icon from the layer settings on the right side of the screen and adjust its properties as needed.