Create new Merchant
To create a new merchant click on the create button on the right side of the screen.
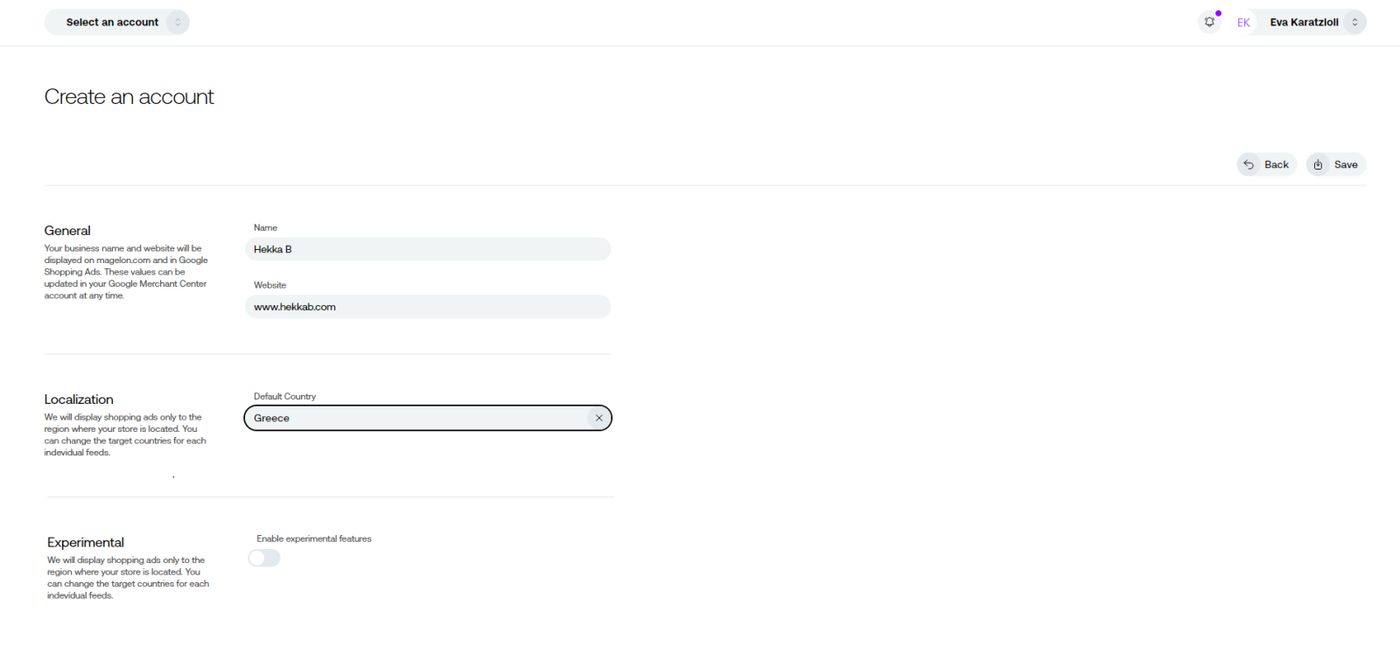
Provide all the necessary information
-
Name: The mane of the merchant
-
Website: The website of the merchant
-
Localization: The country that the merchant advertise its products
- Experimental: You have the option to enable various experimental features
Adding a feed to a merchant
Next you need to upload at least one feed for this new merchant. After adding the information of the merchant you will automatically redirect in the feed information you need to insert.
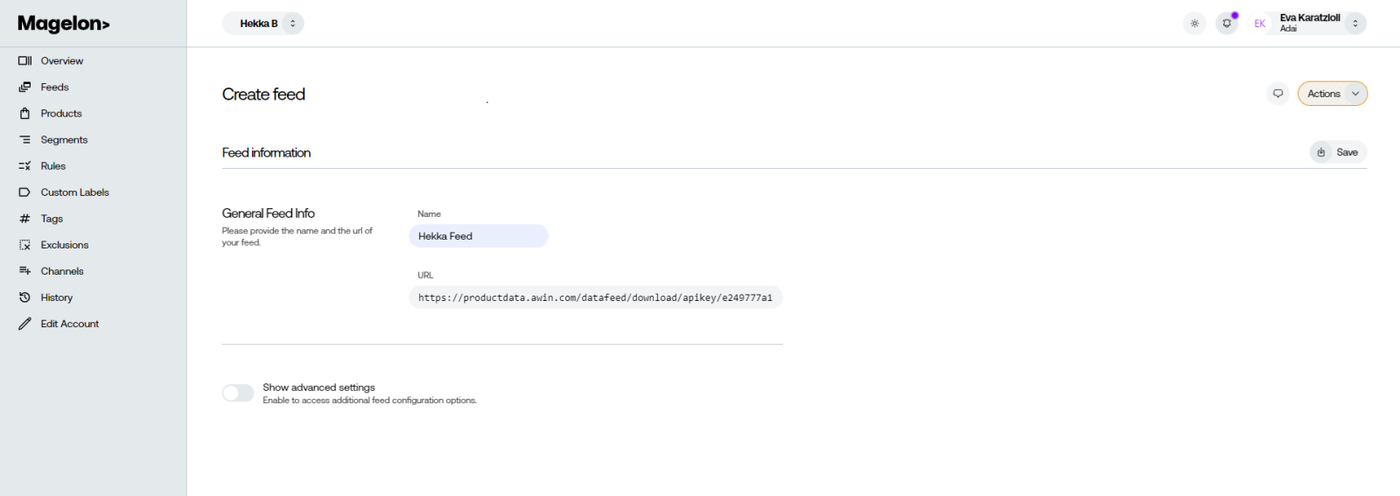
As shown in the image above, you need to provide a name for the feed and the URL of the source XML file under the General Feed Info section.
There are also optional advanced settings available. If you wish to make additional changes, simply click the Show Advanced Settings radio button to reveal more configuration options.
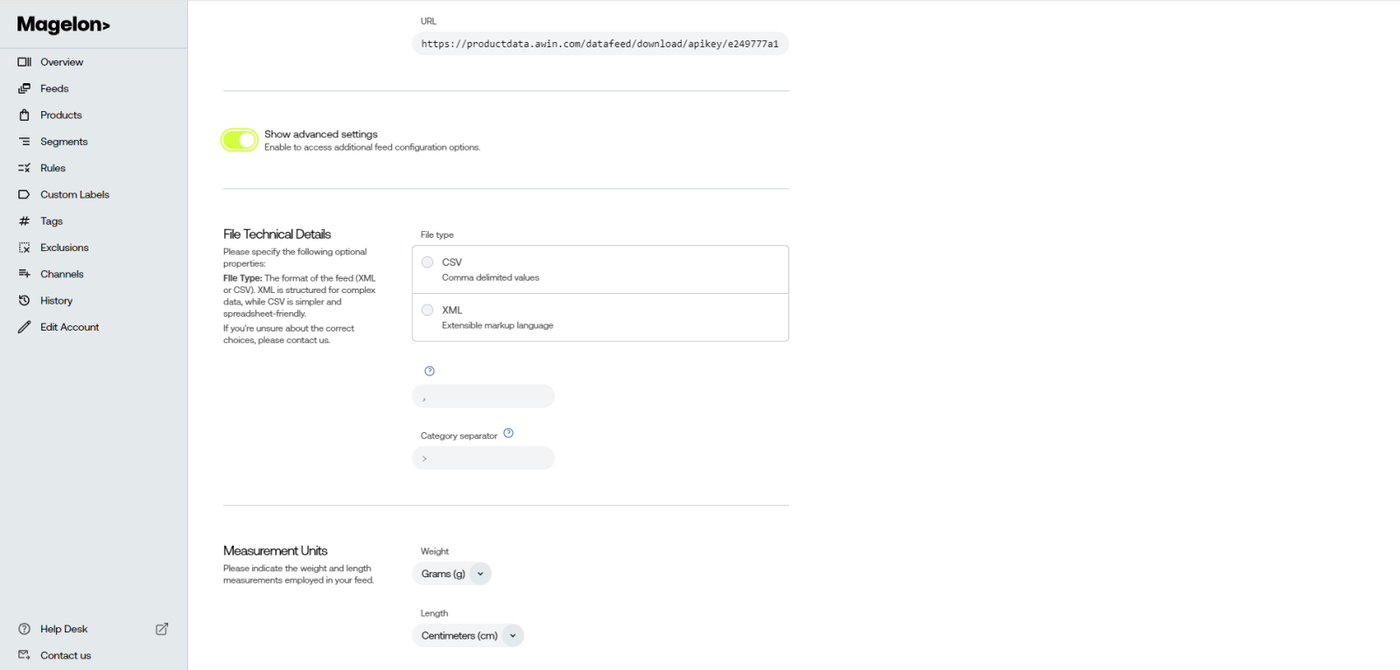
In the Advanced Settings, you’ll find the following configuration options:
File Technical Details: Next, you need to provide some information about the file type of your feed, like its type and the delimiter that is used to separate multiple level categories. Upon selecting the file type, the separator character and the category separator will be automatically filled.
Localisation: Next, you need to choose the country, the language of the context of your feed and the currency your products are priced in. Upon selecting the localization on the previous step, these fields should be automatically filled
Measurement Units: Usually these fields are already filled too, so check the values and change them if needed. Note: The values that are in Magelon’s drop down lists are those that are compatible with google. Any other measurement units aren’t supported by Magelon nor by google.
Next, click the Save button to save the feed and complete the creation of the new Merchant.