

Workflow for using Banner Templates
Using Banner Templates involves a simple workflow that allows you to generate dynamic product creatives and use them in catalog advertising platforms such as Meta, TikTok, and others.
Follow the steps below to create and publish your banner creatives:
Step 1. Create your Banner Templates
Create one or more Banner Templates based on your marketing needs. You can use different templates for different product groups, allowing you to display unique creatives for specific campaigns, brands, product categories, sale items, or any other criteria. More on how to create a new banner here.
Step 2. Create the corresponding Segments
Create the product Segments that match each Banner Template. This allows you to assign different templates to different groups of products based on the segmentation rules you have defined. More on how to create a segment here.
Step 3. Create a Channel
Create a new channel for the platform where you want to publish your catalog, such as Meta, TikTok, or any other supported channel. In this example, we will create a Meta channel to demonstrate the required settings.
Go to Channels → Create.
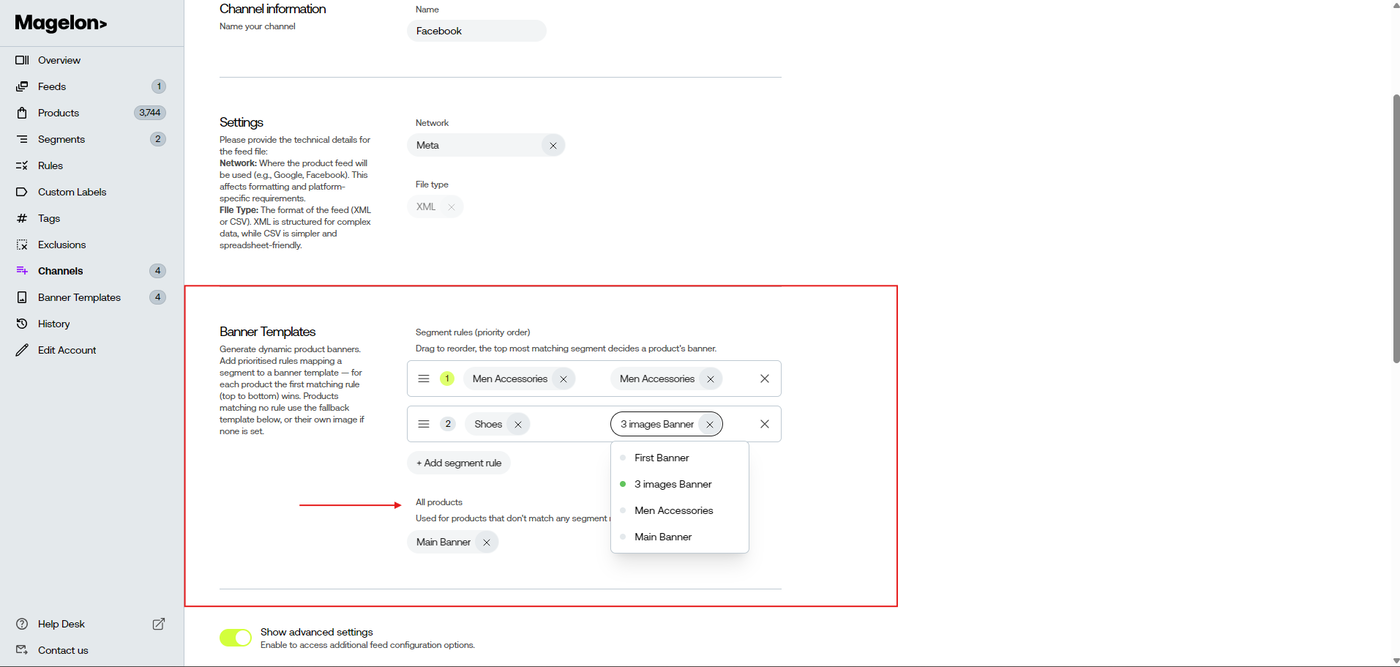
In the Channel Information section, enter a name for your channel, for example Facebook.
In the Settings section, select Meta from the Network drop-down menu.
The Banner Templates section is where you define which banner template will be applied to each product. Here, you can create one or more rules by assigning a Segment to a specific Banner Template. This allows you to display different creatives for different groups of products, such as sale items, brands, or product categories.
You can create as many rules as needed. The rules are evaluated from top to bottom, and the first matching rule is applied to the product.
At the bottom of the section, you will find the All Products option. Here, you can select the default Banner Template that will be used for any products that do not match one of your Banner Template rules. If you leave the All Products field empty, products that do not match any rule will use their original primary product image without any Banner Template applied.
Step 4. Generate the images
After creating your channel and assigning the Banner Templates, you need to generate the images that will be used by the channel. To do this, navigate to Banner Templates and click the Generate Images button. This will start the rendering process and generate the product images based on the Banner Template rules configured in your channel.
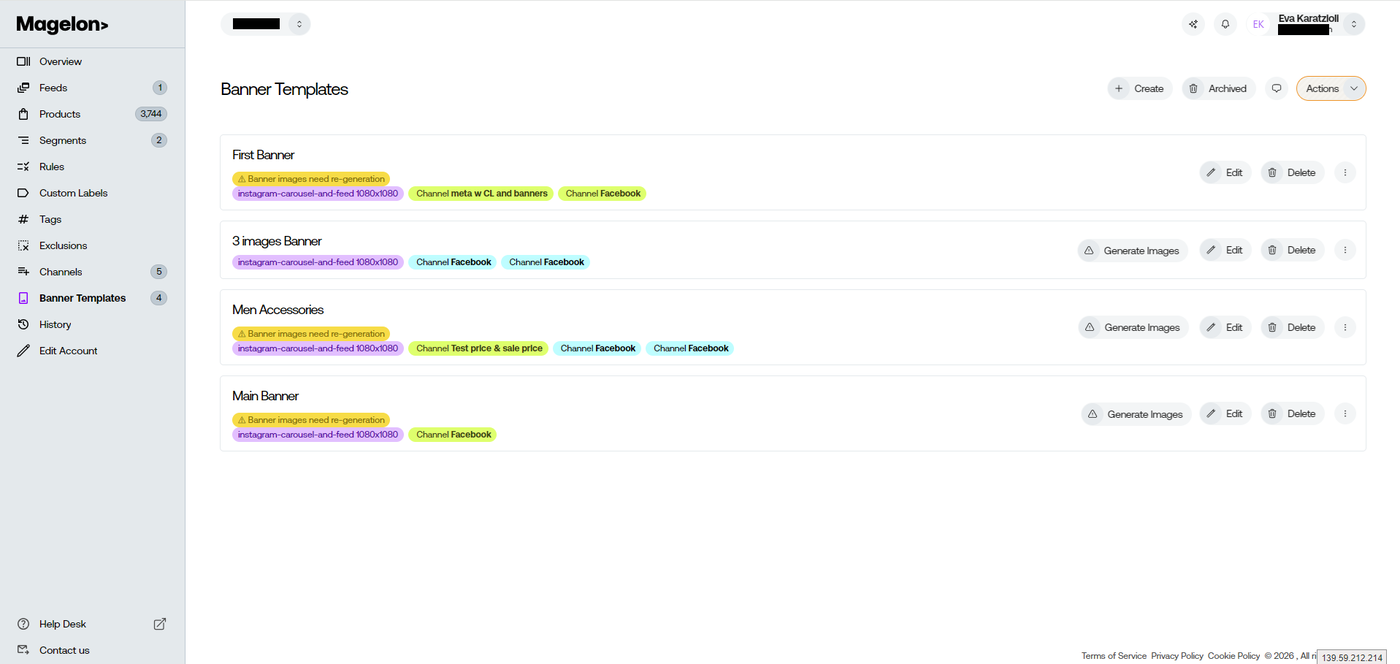
You will then be redirected to the Rendering Progress page, where you can monitor the status of the image generation process.
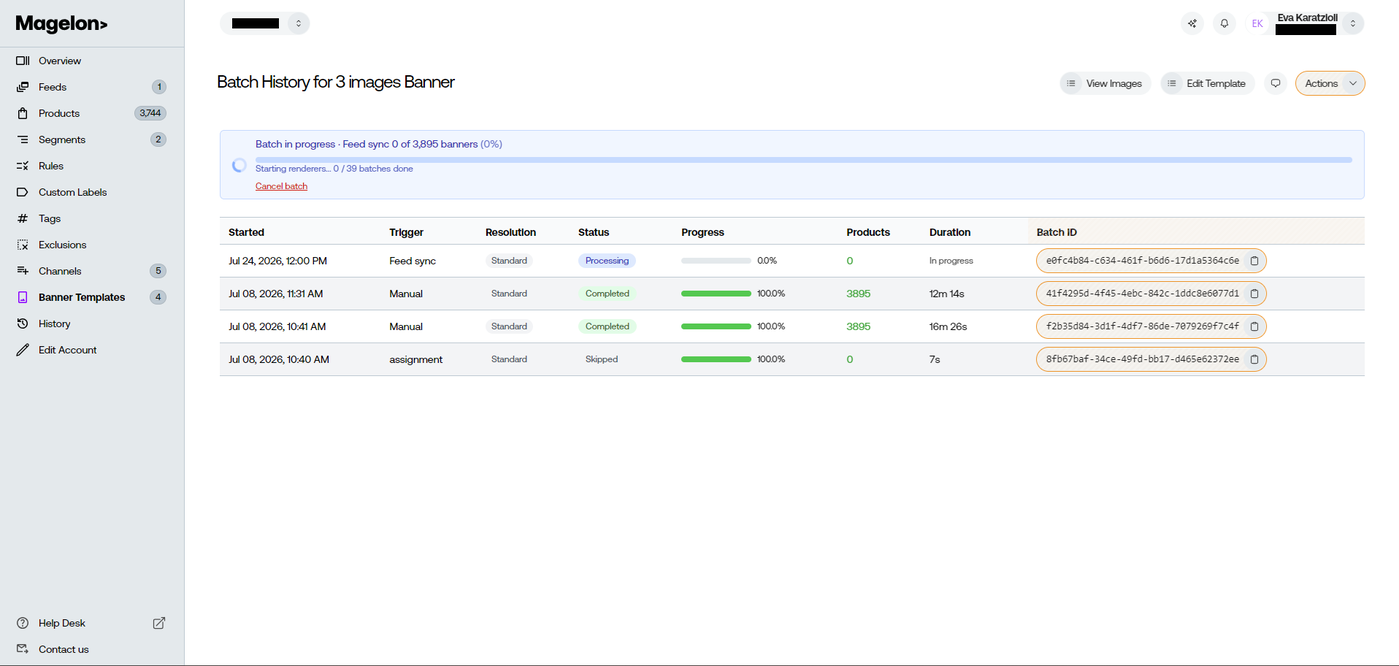
If the rendering process takes some time, you can return to this page at any time. Simply open the three-dot menu next to the Banner Template and select Batch from the drop-down menu. You will be redirected to the Rendering Progress page, where you can check the current status of your rendering jobs.
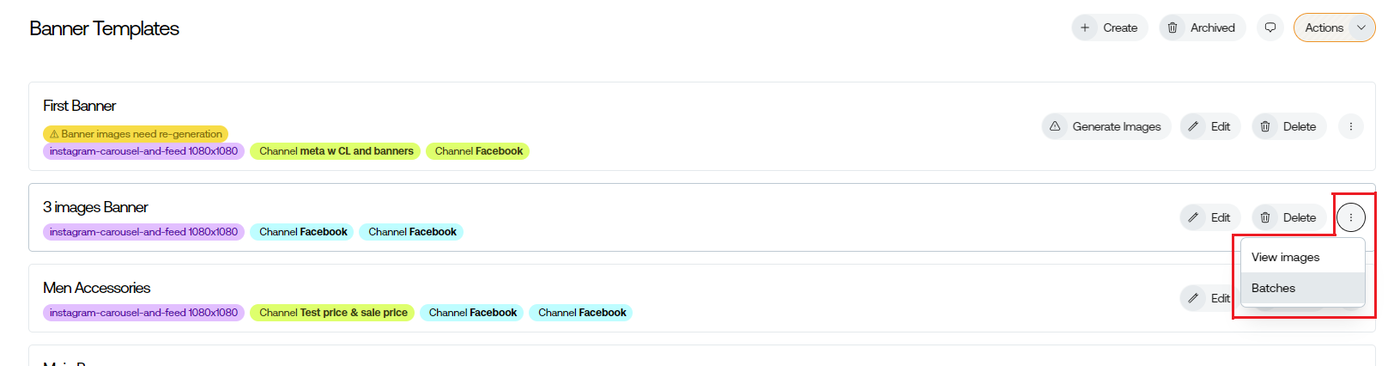
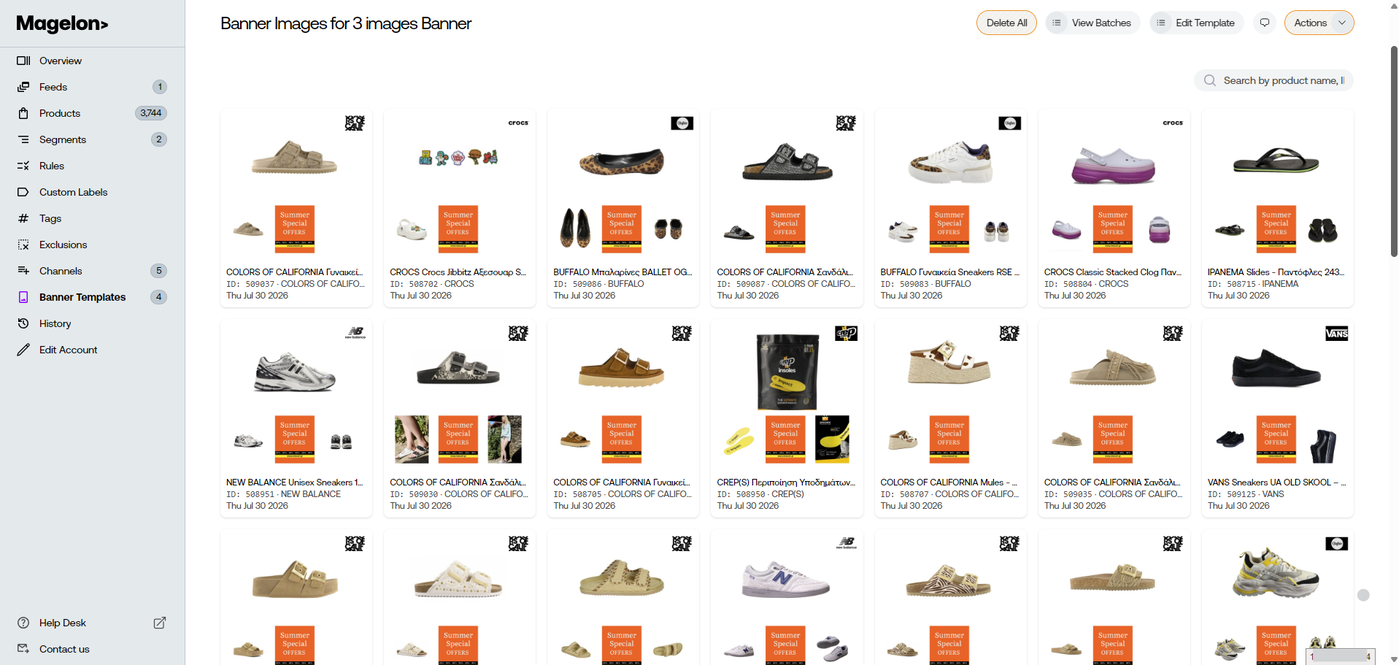
After the rendering is complete, select View Images from the same menu to preview the generated images and verify that the Banner Templates have been applied correctly to your products before publishing your catalog.
Step 4. Generate the images
After creating your channel and assigning the Banner Templates, you need to generate the images that will be used by the channel.
To do this, navigate to Banner Templates and click the Generate Images button. This will start the rendering process and generate the product images based on the Banner Template rules configured in your channel.
Step 5. Copy the feed URL and use it in your advertising platform
Once the image generation process is complete, you can copy the feed URL and use it in the corresponding advertising platform, such as Meta or TikTok.
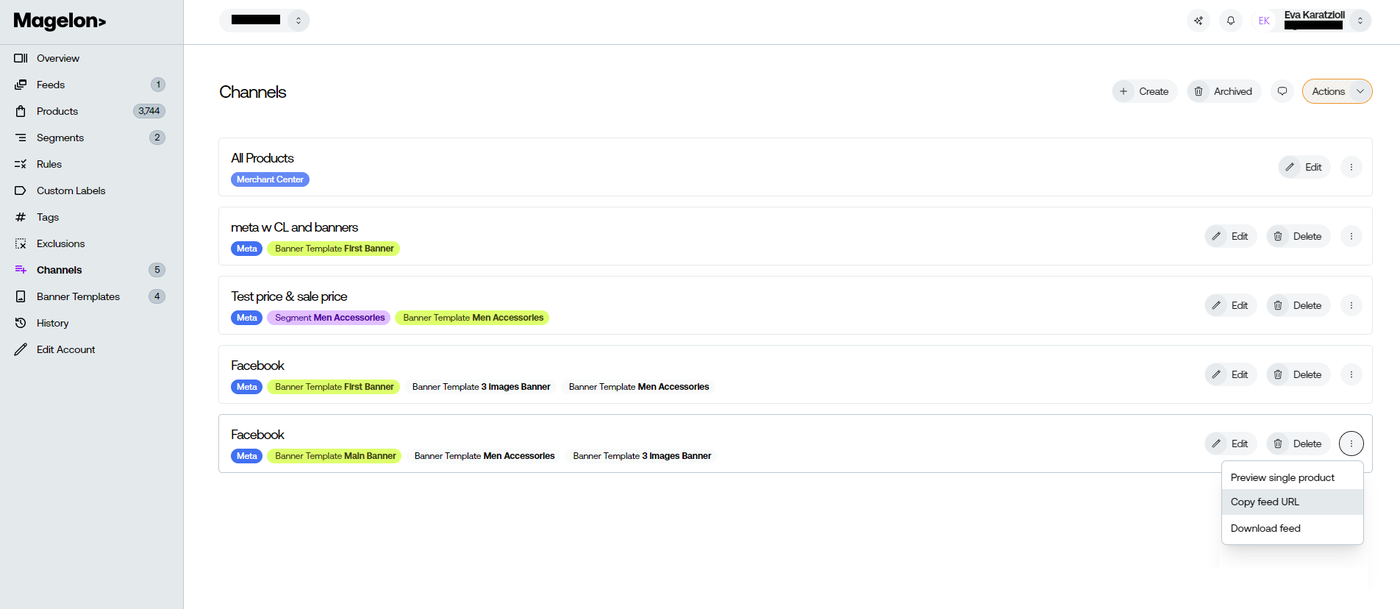
To copy the feed URL, go to Channels, locate the desired channel, and click the three-dot menu. Select Copy Feed URL from the drop-down menu.
You can then use this URL in your advertising platform to connect your product catalog with the generated banner images.